


1st One 1995 Honda CR250
2nd one 1992 Honda CR250
3rd one 1986 Honda CR 250
4th one done 1991 Yamaha WR 250 Restored. For some reason this one will not link like the top 3.
https://www.vitalmx.com/forums/Bike-Builds,46/1991-Yamaha-WR250-Back-to-Mostly-Stock,1402780]
5th one done 1988-1987 Honda CR 500. The link below.
https://www.vitalmx.com/forums/bike-builds/1988-honda-cr500-back-1987
Yes that’s right I will try and do 4 at the same time.


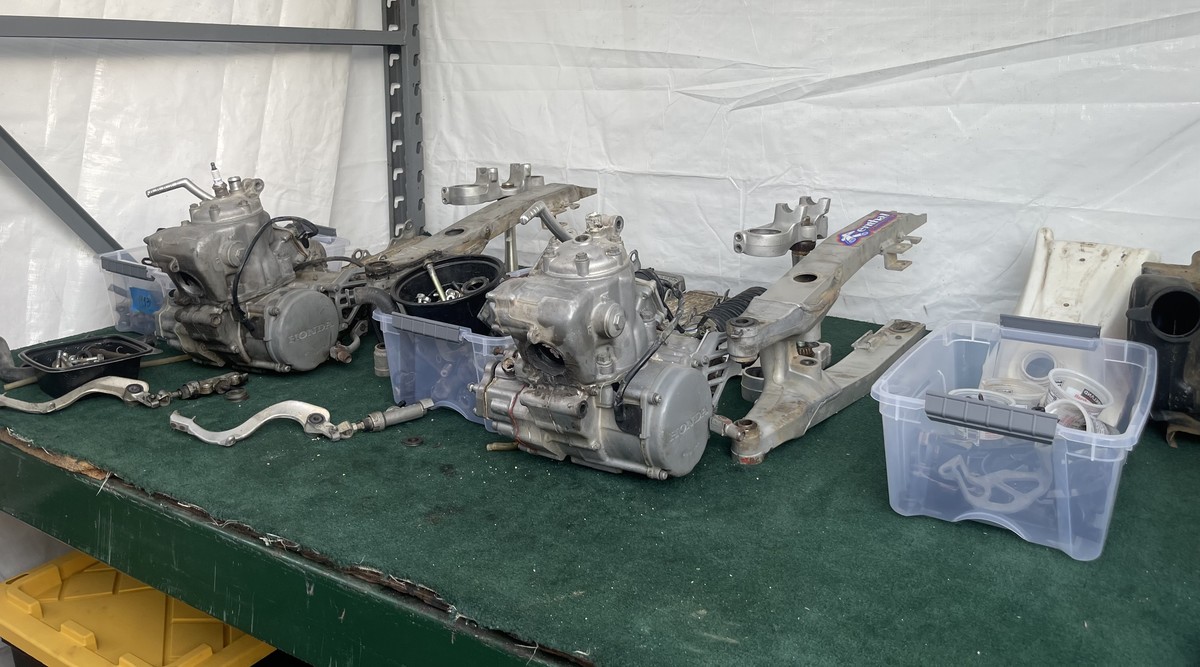
These are the last 4 used bikes I have. These were all purchased from 2018-2020.
I figured since the business that does my zinc recoating charges by the 5 gallon bucket I can save hundreds by combining all the hardware.
None of these were insured to be running before purchase. I knew I would be fully restoring each one. But I would not do that again. The 94 is the only one with slightly less compression than the other 3.
I have (3) 1995 CR 250s. I did not mean to buy 3 as one was represented as a 96. It had the correct color airbox which is the easiest tell on a 96. So that one will be restored to appear correct. It will have the twin chamber Showa’s and the proper shock with the red anodized adjuster since I have one and already rebuilt it.
No effort will be made to suggest it’s a genuine 96. It will have the 95 frame tag in its correct position.


I cut the chains off on all four to start with.
Next stripped all the plastic off and tossed it. Fortunately UFO offers replacement. None of those were in good enough shape to spend the time restoring.

I’m under no illusion just how much work this will be. Much less expense. When I think of lacing up 8 wheels, restoring 8 hubs, taping up 8 discs and rebuilding 8 calipers just to start its hard not to feel overwhelmed. I know the time it takes me with specific tasks. My plan is to tackle individual components at the same time.
So it begins.
Excellent!
I can’t wait for this. Very cool
Holy Hondas, this is a different angle lol
one tool one time
This will be super fun to watch. Good luck
The Shop
Yes love it,
Brave man! The only parts that are very hard to source are new transmission gears and engine cases but I do believe someone in the UK are remanufacturing gears….
Since I have been distracted with turning several office/warehouse spaces free time has been tough to find. So I have tried to put time in where I can.
The 1992 Honda CR 250 I already restored is receiving another partial restore. This lead me to tackle the silencers for all those 4 bikes.
I double restored the 92 silencer along with (2) FMF spark arresting, (1) Pro Circuit standard and another stock Honda CR.
Looking at those FMF silencers which were nightmarish in disassembly I just decided to cut out the spark arresting feature.
I cut out where that turbine was and than cut it again as short as I could.
I used some 1/4” painting tape to give me a guide with my portable band saw.
I cut through and finished the metal in order to seat the end cap. So there is life to be had in these FMF silencers if looking for a more original non-spark arrestor look.
I did try and remove a significant dent in a stock Honda suppressor. I used heat from a portable acetylene torch which proved way too much of it. Melted the aluminum quickly.
Before
No after shot of that. Too ashamed of ruining it.
I did find fixing that Pro Circuit pipe a method of using the steel end cap as a fixture to drive through the body to help push out damage. Unfortunately I discovered this after ruining that other one. But it work very well. I heated up the area I wanted to repair and drove the end cap turned around through it. I kept some heat on the area I was trying to push out. This would have worked perfect if the damage was not directly next to or under one of the frame mounts. I just was very tentative on how much heat I used and I knew heating the mount was important to totally remove the dent. If I didn’t care if I damaged the pipe I believe more heat would have allowed the frame mount to push up.
Pop riveted on the end cap on (4) of them. Next was to remove as much carbon as I could from the core screen material.
It may be hard to see but the middle areas of these become completely clogged with carbon deposits. Such that they no longer pass combustion gasses into the packing.
I would love to know just how much or if any performance is lost when the silencer just acts like a straight pipe due to carbon build up. I know the inside of the screen becomes covered and partially occluded due to build up. So you get less flow. But I have no idea of how much or how little this also is a factor in performance.
This amount came out of just the feed pipe to the silencer. My attitude is if you are not addressing carbon build up in your pipe and silencer you may be missing an important aspect to over all performance with a 2 stroke. I rarely see in rebuilds/restores much discussion about throughly cleaning these.
Heat by far is the most effective way of hardening this stuff and making it easier to remove. Once heated red hot I was able to lightly tap the those sections and break out the carbon.
This is one I forget to heat and had to use a hand tool to poke the individual holes. Probably 30 minutes doing this.
I cerakoted the steel pipe and end cap in gloss black first. Then into the oven. I taped off the end caps and shot the bodies with again Cerakote.
Saw a YouTube video on a guy using the pictured material from Lowe’s to repack. I was going to order the FMF repacking material at $15 a package. This stuff was like $7.00 for one which was enough to do (4) silencers.
Boom…Done with these.
I’ll be watching this one closely!
Hahaha… Well this will be a long one with plenty of content. In fact I have shot much more in images that I have shared. More close ups of each bike and specific areas. I should be able to use those when I start the rebuild and need before images.
Continued disassembly. I will not measure and photograph every bolt and nut for these. Realistically they are basically all the same. So once I get all the hardware done I will separate it all out. My plan is do specific elements together vs just concentrating on one bike.
I started my list of what I will need to replace. So I first went through what I had already disassembled and created the list from that. I added to it as I completed more disassembly.
The key here is to separate out parts at the early stage. So aluminum goes into one container, steel for re-zinc in silver and gold also gets separated. I will clean each element of parts together. So all the bike’s aluminum in one cleaning session etc.
So one apart so far. I haven’t found any glaring issues with disassembly so far. So no seized bolts. The 93 and 94 should be the worse shape given neither ran nor had done so for some time. The motors of course will be another story potentially.
Right now I plan just to buy all new Clarke tanks. Restoring the gas tanks is misery due to the length of time it takes and few shortcuts except for getting the shine back.
Restoring mid 90 Honda CRs May be one of the best series to do so with. Parts are available with the exception of say air boxes. I haven’t needed as of yet to replace power valve components so I have no idea of availability.
Forks will be twin chamber Showa’s for 2 of them that I already have built. I have a set of mid 90 kit KYB forks. I haven’t decided which bike will get those. If I had a set of great condition upper outer fork bodies I would be set. I cerakoted the set I took off the 92 CR250 in gold. The Cerakote gold is a poor example of what this manufacture really offers. Too late for a re-anodize back to Gold. Plus I would discourage this since you need a very clean set of outers to start with.
These below were re-coated in gold anodize.
Cerakote gold. Looks much less like Gold in person.
The 93 is fully apart. The 94 is next.
I had 3 cr125,s apart last summer. I didn’t really hv enough room to get organized. It cost me a lot of extra hrs assembling. Which I did outside on the black top. I did get a great tan tho. Good Luck. I think it’s totally crazy but CooL as hell.
If I can get these 4 done in under a year then I’m doing great. Certainly no small task for me as I remove seam lines from casting, refinish all original hardware, relace rims, rebuild all suspension and rebuild the motors. I do sub out the powder coating, re-anodize of nuts/bolts and have a pro do my seat covers.
I do hope to get skid plates and mounting tabs welded on all of them along with the water pump guard I am fond of doing.
I plan to cut no corners and do them just as well as I have done the last 4. Thanks for the interest in my efforts.
All the old stuff that is being replaced is going into that bin in the image. Anyone wants the contents for free just pay shipping and I’ll box it up. Should be a pretty meaty box with a variety of original and aftermarket Honda parts after I get them all torn down. One man’s junk is another’s super cool free replacement treasures. Or something like that.
Edit……..
Looks like that bin is spoken for already haha. Good for him in taking it.
You sir, deserve a bravery award. Doing one of these is bad enough but 4 at the same time. I applaud you, best of luck and im fully along for the ride.
Thanks RM. The process is very straightforward. The challenge is just staying motivated.
2 stripped.
Big respect for doing such a thorough resto on four at once.
Is the plan to keep them for display or sell after?
Thanks Loon. I hope to use them in self promotion for providing this type of work for clients. The only one I may keep is the first one I did. I have to sell them eventually to possibly make room for client work if it comes. I would have already been listing bikes if it was not for the need for physical examples. Images only tell so much.
Hopefully when I get these out for promotion I might be lucky enough to get some deposits on one or two. The understanding will be I hold onto them until I have self promoted enough.
Another one apart.
I have been thinking just about getting the frames ready for powder coat to start. I have 4 different styles of skid plates and I need to make and weld tabs onto these frames. Plus I have to do the water pump aluminum guard mounts. Not to mention my fat tub of calipers I have to disassemble and remove seams and clean up the casting finish. Bold or brave? Possibly naive and stupid for trying this.
It’s a mite bit hot here in the middle of very sunny California. But no body else is going to finish tearing these down.
The final one done. Had a slight issue with the top of the shock mount on one of these things 95s. The last owner crushed in the mount which effectively locked in the shock.
Fortunately I was able to remove all major fasteners for swingarms and linkage. I have read often of horror stories of owners asking how to remove this or that. A couple of the swingarm axles were tough but using a short sledge and a steel driver convinced those to move out. Lots of rust in those associated bearings which will translate into unique opportunities to remove bearing races.
Radiator. Love this kind of challenge.
Gots to have organization…Gots to.
Boom…
Cart O’Frame.
Yeah… Dismounting.
Double boom… Done.
This...
looks like a Kim Kardashian photoshop job!
Been awhile since I updated here.. It’s been Africa hot here along with work. The only good thing about Central Valley summers is……………… Nothing. Absolutely nothing. But at least it’s dry heat thankfully. Well those two elements have slowed me but not stopped me.
My focus has been own collecting hardware up to send off for anodize. No small project given brakes, motors, and shocks need to provide hardware additionally. So basically I have to disassemble completely brakes and shocks. Motors should be simple.
Brakes.
As expected I see the usual issues with brake components from bikes 35 years old or so. I am convinced few owners service these items outside just pad replacement. Not surprising given most owners overwhelmingly do not run these bikes to a level where regular servicing would benefit them.
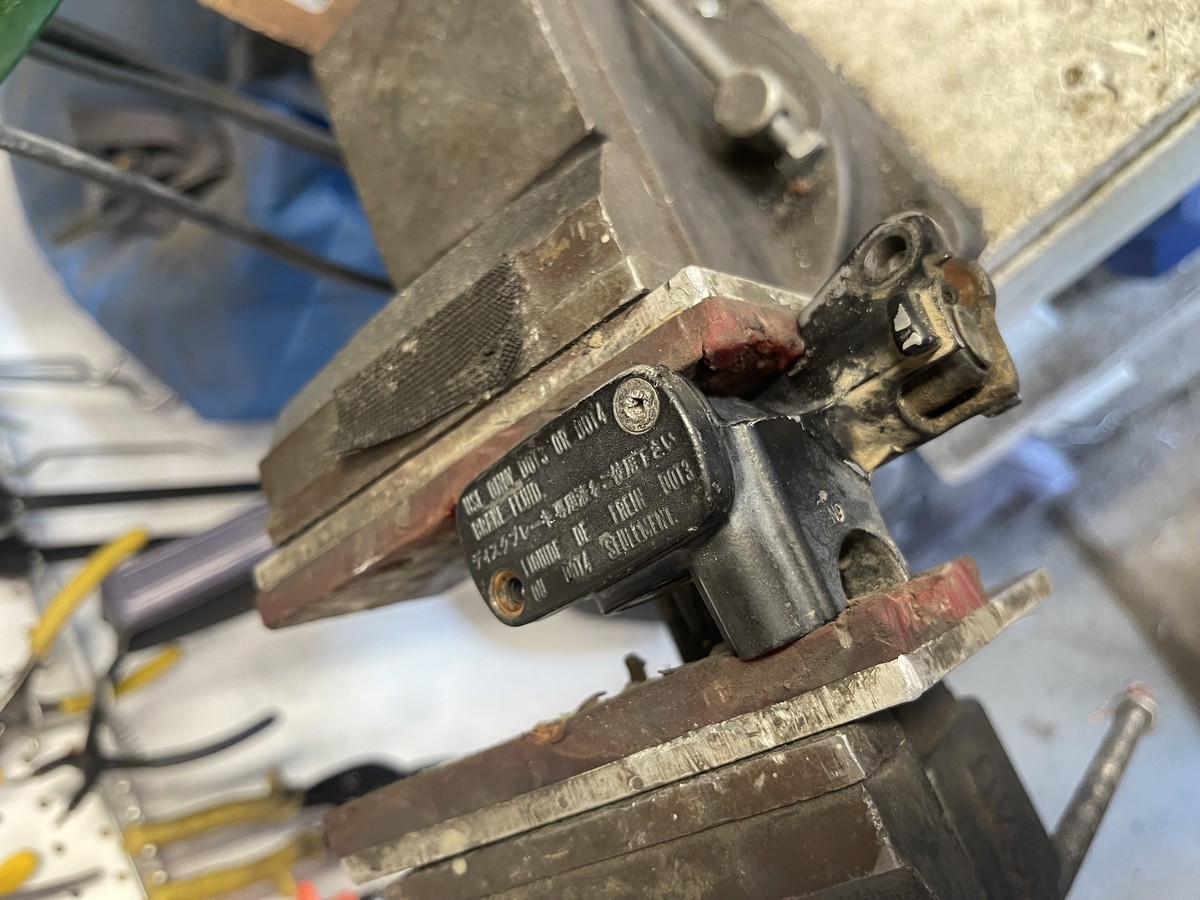
The rear master cylinder is a haven for rust and debris. The actuating threaded rod that moves the piston should be looked at. You could service that area without needing to remove the lines easily. I usually fill that recess with the same lubricant I use on the caliper sliding pins. A silicone based product.
All those images above before taking apart.
This is very typical on the rears. No way this would budge with at least 130 pounds of air.
Had to take heat to it and relieve some of that tension on it.
I have no idea how others remove pistons from calipers. Grabbing the piston on the fronts will mar those easily. At least the rears on these are metal bodies. But they will still mar. I use compressed air. I strip all the parts off and leave the bleed valve closed.
I start with an old pad as a block so I do not shoot the piston out like a rocket. Once I get it moving I replace that pad with a butter knife as a block.
This blocking method works great for the twin piston fronts. This way if one piston does not move as freely as the other you still have a closed system to create constant pressure. I had not issues with getting front pistons out. A couple of them I just had to maintain constant air pressure. Just be careful with where your fingers are when using this method.
So typical with the corrosion. Something can be said with the design of these master cylinders. Despite the condition/age of these I was able to pull them all apart.
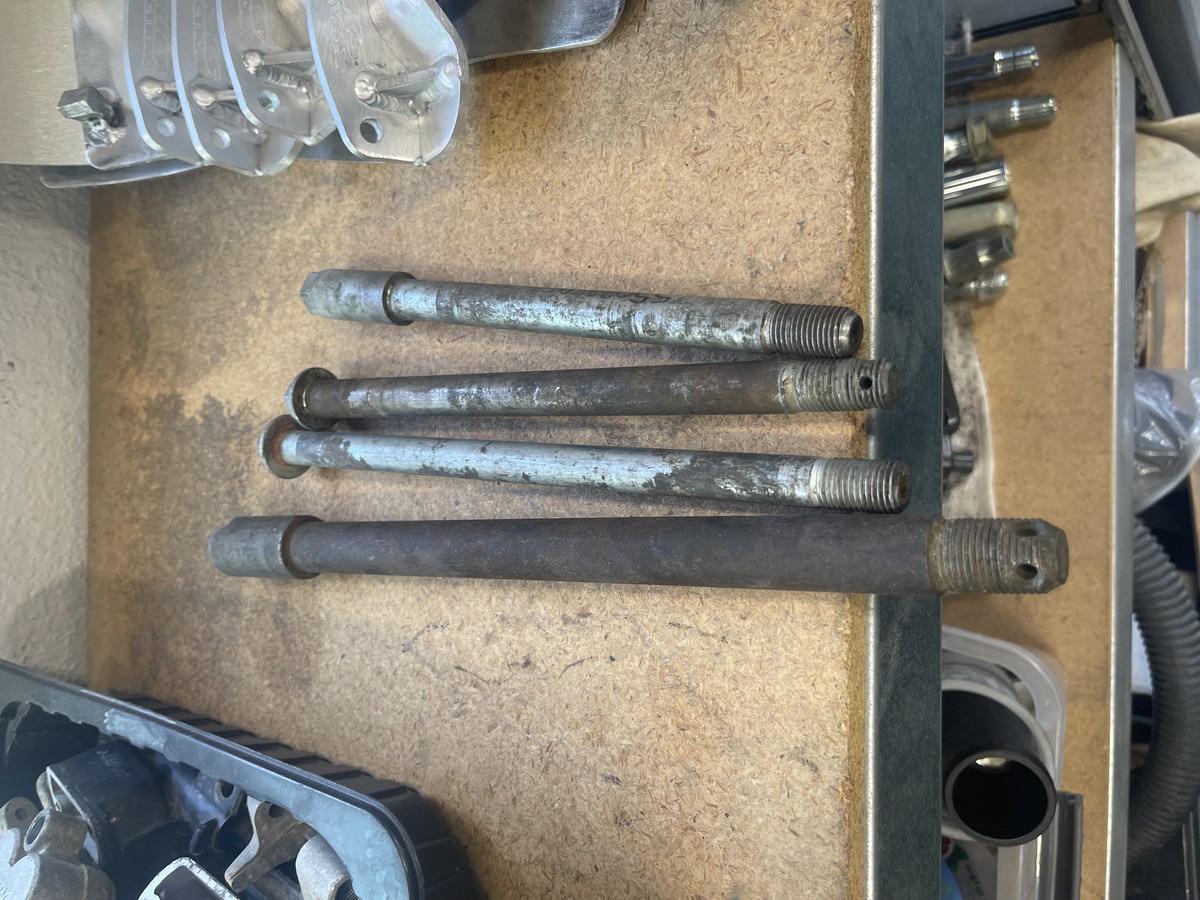
These shafts will be zinc coated in the gold/yellow color. I always clean these up probably more than I need to. I like to polish the engagement surface prior to re-coating.
Here is a perfect example of my approach to my restores. Even these caps for the pad pins get attention. Screwdrivers will often lift edges. I hand filed these to clean them up. I will zinc coat these in the gold color. Black is the original color but I prefer the gold color.
Another super common issue with these bikes. I don’t blame any prior owner for grabbing a standard Phillips and attempting to remove these screws. But these screws are notorious for rounding out under moderate pressure. Any 90’s Honda CR Phillips screw should be checked for fitment prior to using any tension to remove it. Set the bit into the screw and see if it slips out when turning it with finger tension. If the bit does not lock in you will strip out that head.
My good fortune found at least 4 of these which would require special attention.
*
Pit Row
This is what I use on 98% of marred/stripped/broken screws/bearing races and anything else. Dental bits and a Dremel. Buy these from eBay. They are cheap and incredibly versatile. You will be amazed at how well these bits cut steel.
I used a small sharpened punch as a drift to drive that outside edge of the cut. I did 4 of these the exact same way.
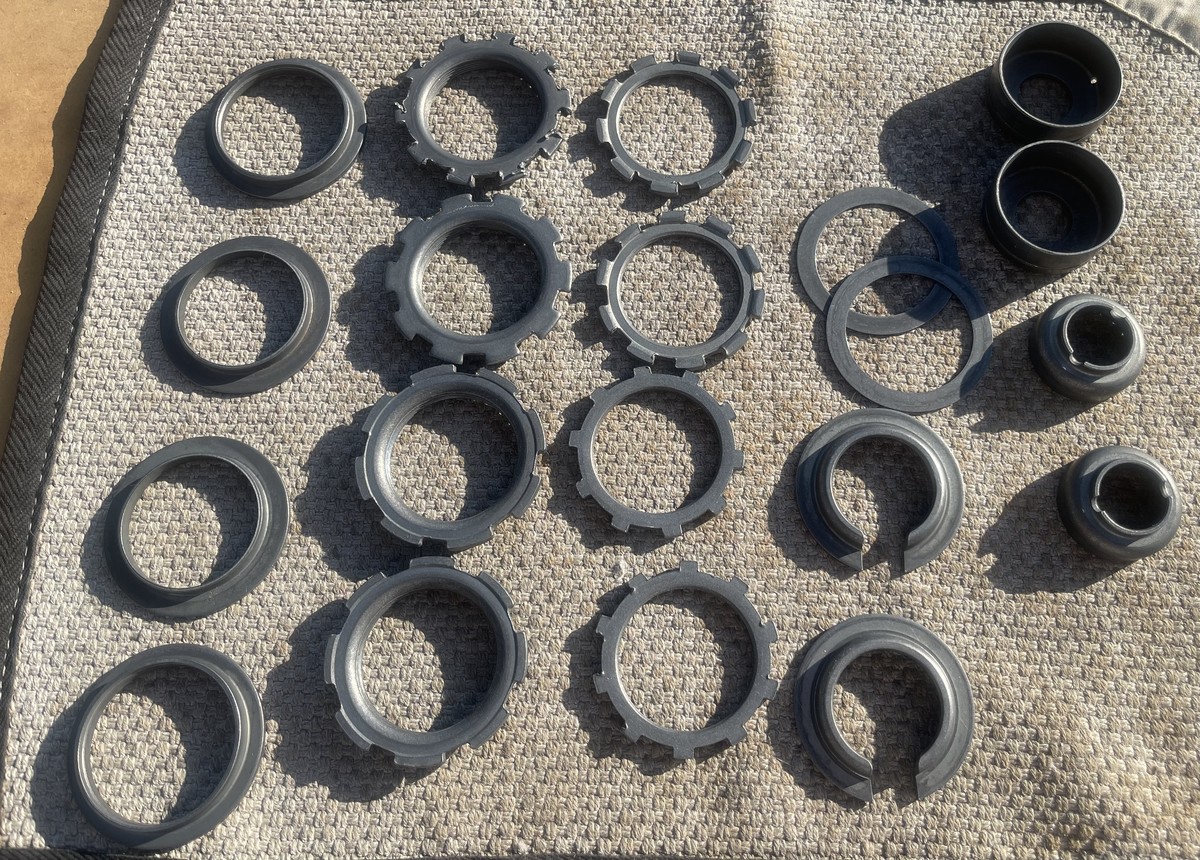
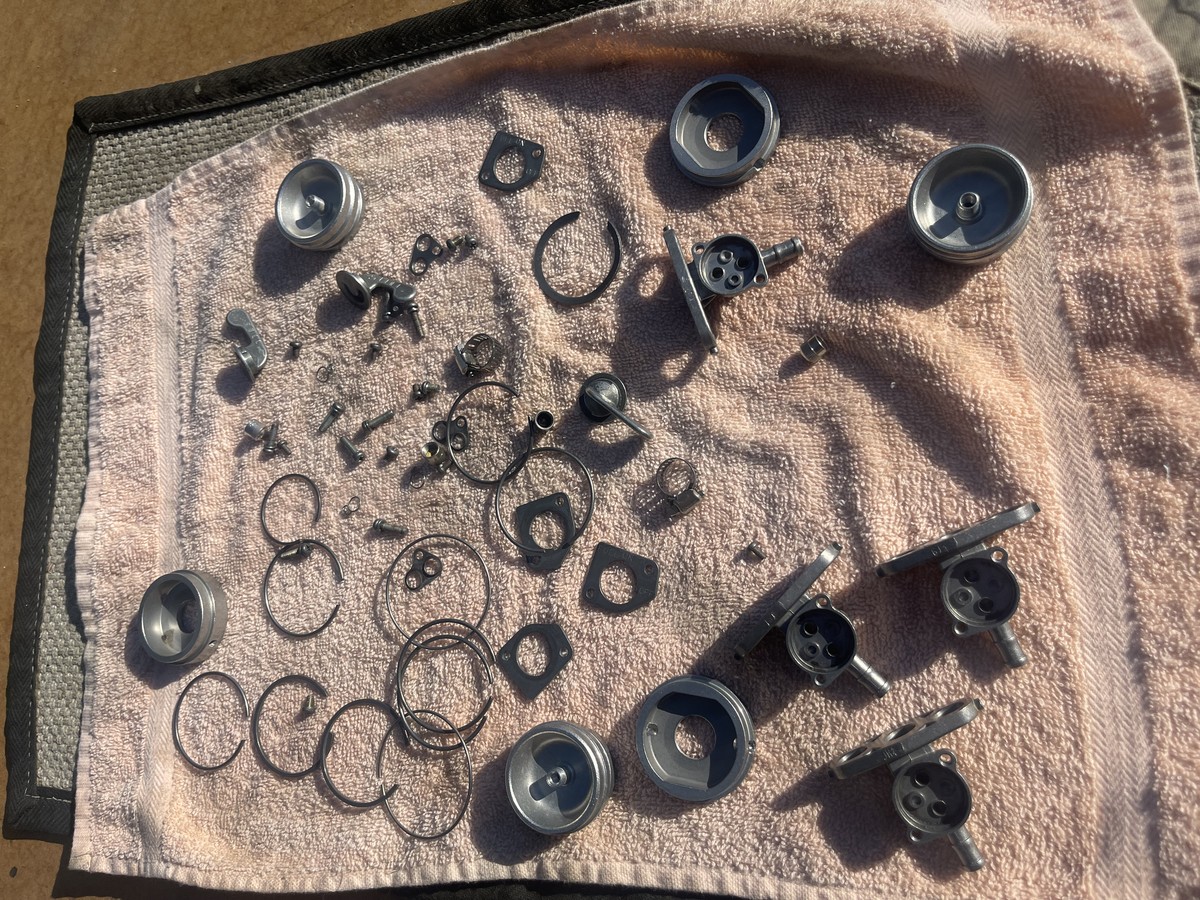
What 4 sets of brakes turns into when disassembled.
All these parts will be restored. Ripped rubber replaced but most of it will be carefully cleaned and re-used. Piston tops for the front calipers will be removed and cleaned up also. I doubt I will re-zinc those. Too fragile to risk getting damaged by the zinc service.
Next update will be covering the ridiculous amount of bolts/nuts/washers/screws etc that have to be cleaned prior to re-coating. A stupid amount. Plus I am making sure all the extra related items I have will also be recoated. It will be a nightmare sorting all these items once coated since I am adding so much more.
I am changing the carb on a 1989 CR250 I just bought and will have the silencer off anyways to swing the subframe out of the way. Now I will check for carbon deposits!
Good for you cross. Replace the packing anyways since it is so easy to do and cheap. Clean the inner screen.
‘It wouldn’t hurt to check the head pipe opening. If it’s occluded with carbon than cleaning that up will further help you.
Frozen screws in the master can be a bitch! Same with seized brake pad pins in the caliper!
Good to see you in my thread brother. Thanks for stopping by.
Dremel and dental bits. It takes time to cut away at material cause you know... dental bits. But I have never had a bolt or screw I could not remove once I started in with that.
I have been staying busy with these 4 bikes. Since I had a bunch of extra parts I also stripped those and have included them in with those 4 bikes. So I have been quite busy getting parts prepped for paint or recoating. Loads of before images but felt I would wait until recoating of zinc before showing all the before.
Just like the shocks have been taken apart and stand by awaiting recoating. Once I have the hardware coated (nuts/bolts/what not) I will really get going on spraying.
Right now I'm welding on brackets on all the frames and sorting out which skid plates go on which frame. Trying to get these done for powder coat. Will take 5 frames since I had a extra 92 CR250 roller purchased by me in pieces. This was quite a few years ago also. Since I have the title on it I plan to make it a complete roller.
So plenty going on for me with these bikes.
For some reason I prefer to fashion my own mounts for skid plates. This is helpful since I tend to buy a variety of used skid plates with their only commonality being they were all cheap. That aspect of fashioning my own mounts is a bonus when it comes to mounting all those plates. No two mounted the same. This was a combination of each being different along with my questionable welding/fabricating skills.
I also like the Works Connection series of YZ case guards. Why the older YZ series? Cause I could get them dirt cheap off eBay. I add a mounting tab to to make them work on the CR frames. Why even do the guard? I just prefer the look. Very reminiscent for me of the factory CRs. Also I’m trying to establish specific aspects to my restores that continue through them all.
So, weld on case guard tabs, brackets with welded on nuts, cover and weld up frame damage and some other welding to repair subframes.
‘This abrasive wheel on my Dremel made clean up of the metal prior to welding a breeze. Worked much better than anything else I tried. Aggressive enough to not remove metal.
Tabs for the case guards. I’m kind of eyeing its location since I did not put a motor in the frame. Mounted the guard to the tabs and spot welded where it looked right. Took off the guard and welded the tabs up.
Skid plate mounts. Due to all the different plates I used several of them needed heat applied to get them to form to the frame contours. Tried a propane torch and a heat gun. Laughable how ineffective these worked. Used a mini acetylene/oxy set up and this worked quickly.
First step was to fasten it on one end. Use vice grips to clamp it into position. Heat the plate to relax it into position.
The 92 had some frame damage which I believe was mostly due to rust thinning out the metal in that area.
A skilled fabricator would just cut the section out and weld in some new tube. I do not resemble that and such used some metal the same outside dimension. I cut it in half and than dabbed sections to match the contour of the lower frame rails.
What do welds look like when you forget to turn on the gas? Glad you asked and I have some examples of that.
Fortunately I know just enough about heat and contorting due to excessive build up of that heat I was sure to only weld briefly and let it cool.
I tried to blend in the welds as much as possible. These repairs shouldn’t even be noticeable since I’m running a skid plate and case guard.
More welding adventures in my next post.
Super valuable info shared in this thread..
Thanks WFO
The only commonality is they’re cheap lol
This is my favorite thread on vital, thanks for sharing man.
I grabbed up a stand to easily secure my frame when working on them. Using a quick release clamp to keep the main tube down into the fixture. This worked incredibly well for me and was simple to construct.
One frame was missing a nut for the tank mount. Took a bolt with a nut on both sides of the bracket to hold the nut I wanted to affix in place. Worked great.
I rounded out a skid plate retaining bolt. A cinch to create an extractor when you have a welder out and some scrap metal around.
Wanted to make mention of these fiber wheels again. The ones I use on my Dremel are what’s left after using on a bench grinder. They start out like 10” or so. So I repurpose the worn down ones. The bits that I use to hold those fiber wheels are purchased through Amazon.
https://www.amazon.com/Preamer-Cut-off-Mandrel-Holder-Dremel/dp/B075WVM…
These bits are awesome and I can attach a wide variety of wheels to them.
Subframes
I cannot overstate pay careful attention to straightness of the subframe when buying a used bike. Half of the restores I have done have had issues with these. I did not pay careful attention at the beginning to just how straight it was to start with. Deal with that ideally with the bike still together except with the sun frame stripped. It is so much easier to straighten it when there is weight on the bike to begin with. Isolating out the movement of the frame when persuading a bent subframe will challenge you. Using the hose clamps and a long persuasion bar made the job easier. Trying to force over the sub while the frame sat on a table was difficult. I had to get something to stand on so I could use my waist to help move it.
Had to replace a retainer metal for the underside forward part of the seat. This is some very thin metal and I had no idea where I would find a replacement. I used a strip of the same material I was making my mounts out of that I quickly cut with a portable handheld band saw. Silly easy to cut that steel. Using an angle grinder corded with a flapper sanding wheel made short work of my generous and over abundant welds. That device will sand metal down with the quickness. I use those flapper wheels to remove mold lines on many of the casted parts.
Yes my holes are not straight in a row and my welds look spotty at best. Bet those are going to hide completely once the powder coating gets on there.
This subframe has given me endless issues. Bought it years ago used off eBay. Didn’t check it out after purchasing to see if it was straight. It looked fine to begin with. Had it powder coated and put on a 1992 I had restored. Once mounting up the rear fender I saw the issue with it. Fender was not pointing straight back. I tried bending it, I tried manipulating the plastic where it attached to compensate. Nothing worked and I spent hours trying to resolve it. You couldn’t see anything obviously wrong with it. Made a cardboard pattern from another good subframe to match up the bend on the right side lower support arm. Heated it up and bent it to that shape. Powder coat gone from there and such had it recoated in powder coat.
Mounted it up on a 92 frame again and knew the bend on the right side was not enough to get it to line up. Heated it up in that area and resent it more. Now I creased it.
Cut a small section of some narrower round metal stock and tried to patch it in over the bend.
Welded that in. But as I was bringing away the excess weld it thinned the edges of the repair piece which was allowing it to lift.
Tore it out and simply filled that area with weld like I should have done at the beginning.
A little more filling here and there and after grinding it looked good enough for who it is for. Me.
I put the sub frame on the roller 92 I am building along with the 4 other bikes and continued to see an issue with the sub frame. I just couldn’t figure out where the problem was with this subframe. Everything looked straight or proper until placed on the frame.
‘Put the frame on the table and screwed some wood over the engine cradle part to hold it. Ended up pushing the table against a wall and had (2) 80 pound sacks of concrete to try and keep the table from shifting. Hose clamped a ridiculous heavy breaker bar to the left side.
I could see just how far moved to the right the frame was.
Used some man strength and moved that subframe over to the left.
When I went to remove it from the frame I noticed difficulty in pulling the sub clear of the frame. The lower arms were under tension from bending it or shifting it to the left. I heated up cherry red at the tops of those two arms and this relaxed the metal. So now they do not have to be forced to properly line up with their respective mounting points.
I have 4 frames back right now. No subframes yet. And as I expected they look outstanding. Next post will be about clearing all the weep holes and chasing threads with a tap.
Well the coated frames would be next but I finally finished sorting over 70 pounds of fasteners that I had recoated.
Normally I have just had recoating done for one bike at a time. In an effort to save money I decided to get all 4 done at the same time. But this time I would insure to get every fastener done. So this meant taking every thing apart except the motors internally. I did pull all the retaining bolts off the motors. If it was visible then it was going to get taken care of. Several times before I would miss small parts simply because I didn’t get them apart prior to sending out or I forgot. Not this time.
My first bike I restored every piece by tedious clean up and coating in Cerakote. Trust me it is ridiculously involved to spray nuts and bolts. They have to be hung to spray and then put in an oven to cure. Unfortunately this style of restoring makes it difficult to minimize material sprayed. Cerakote sprays very thin and covers incredibly well but the problem becomes when using sockets and other on bolts/nuts the paint breaks/chips. So almost immediately your hardware if not careful can look used. So getting zinc re-plating is the only way to properly restore these parts.
Your finished items will only look as good as your prep beforehand. So everything being coated should be stripped of debris. This effort will test your fortitude. I spent at least 2 weeks doing this. It’s just never ending in the handling of so many parts.
These are just my aluminum parts which I will have to spray individually with Cerakote. Before clean up
After initial clean up.
Shock adjuster and other metal pieces. These will be recoated with yellow zinc.
Most of these small parts will be zinc plated. The aluminum sprayed. I’m going for it. I made sure to get all my float bowl bolts and vent tube routers included in my zinc coating. It’s the small stuff that makes the difference.
I was so committed to getting everything coated I even added a whole bunch of nuts/bolts/spacers/washers/axles. I have no idea what those items are for I just decided to add it. This effort hopefully will not be my undoing as I just mixed in a bunch of hardware that these Hondas don’t use. Hahaha… Big deal as I will have some extra stuff that looks great!
Axles are fairly forgiving in cleaning up. Big surface and easy to grip. Just takes awhile.
Coated with zinc.
More and more parts….. And more. Before
After initial clean up. Sprocket will be sprayed. Cause I can.
The haul. Had to weigh it.
I spent $550 to get just over 70 pounds recoated. I paid more since I had so many parts and I wanted them to be wired. This means a person has to wrap wire in a series for every part. Usually runs of like 3 feet. Insanely time consuming for the guy doing this work. The alternative is they just dump all the small parts into a wash bin and it gets coated in mass. Small parts can get lost with this method. I had a bunch of that stuff.
So since it’s all wire tied this is how I get it back.
Getting this free from the wire takes a great deal of time.I started cutting a bunch of it off. This means taking the time to handle some cutters and then put those down and free the part from the wire. This was too slow. So I just started unwrapping the wire the same direction it was tied on. Much faster but still painfully slow. I could do an hour or two and had to take a break. I’m old and hunched over a table and a bucket wears on me.
To be honest all of these steps appear to be a massive overkill. I take a great deal of pride in using as much of the original hardware as possible. So all these steps and major hours is really not too painful. I love this stuff and I know just how great these bikes will look once back together. Too easy to start cutting corners to get stuff done. I will have to cut some simply because doing so many. Even I have a limit to my patience with these processes.
So it’s one thing to get this stuff off the wire and laid out but keep in mind I have to organize every part by size, length, style and anything else.
Remember those adjusters for the shocks? When I get those painted and built they will look brand new.
Brake parts all separated and cased. This will make it a cinch to rebuild them all.
After about 10 hours or so I finally have the parts separated and in labeled boxes. Had to set up a picture.
I look at that shot of all the parts boxed and know you got to have passion for restoring these bikes. Easily over 40 hours combined from start to finish.
Wow! I always enjoy getting hardware back from the Plater. That yellow zinc is the best! Makes reassembly very enjoyable. I have used this wire method myself before sending out to be plated.
Thanks sandman. And thank you OneFiveLight. Glad I can be entertaining.
I have found with at least the yellow zinc will bleach with direct sun exposure. This explains why I see so little of this finish on these bikes when I know these parts are original with that treatment.
I agree it is so satisfying when rebuilding and seeing these parts installed. For these build I know I have been as much of this hardware coated as I can. The problem for me will be I still need some small parts replaced. I rarely see the yellow zinc coming on newly manufactured Honda parts. I even went through my extra Honda new nuts/bolt collection and unbagged these items to get coated.
Handling so much of these parts at one time is daunting. Stupidly I thought just restore them all at one time. When I look at my bins of Calipers that need to be further cleaned up to shoot with cerakote I start to think F it and just go with original finish. No paint. I can easily spend a couple hours on each one before ready for paint. I have no idea if a new owner would even appreciate time spent removing casting seams.
Post a reply to: 1992 through 1996 Honda CR 250s Done. The last 5 years of the Honda 250 steel frames.