

Posts
248
Joined
4/20/2019
Location
IE

Edited Date/Time
12/27/2020 4:28am
What’s up Vitards?
Lockdown is driving us all insane, so I decided to buy the cheapest RM125 I could find to do a full rebuild on and keep myself busy for a week or 2.
I found this thing advertised on Facebook as an ‘08 and thought to myself “f*ck me that’s cheap for an ‘08”. On closer inspection I realised it was an ‘01 and said to myself “I guess it’s still pretty cheap”.
I got someone to pick it up in England and bring it back to Ireland for me.

As you can see it’s far from pretty, the orange frame being the biggest “wtf” of the whole bike. On the plus side it runs really well, although I’m sure some fine tuning of the jetting will help with it loading up etc.
A couple of hours yesterday stripped the whole bike and to my surprise nothing was siezed, broken or badly damaged.

Most bearings and bushings had grease on them, and the only thing I could find worn was the top shock Bush.
I think I will still replace all bearings and bushing now that I’ve got the chance.

At least the previous got full travel on the suspension. The lower triple clamp bolts were so damn tight! And when I loosened the pinch bolts for the front axle the forks sprung outwards. Can’t imagine how much they were binding!
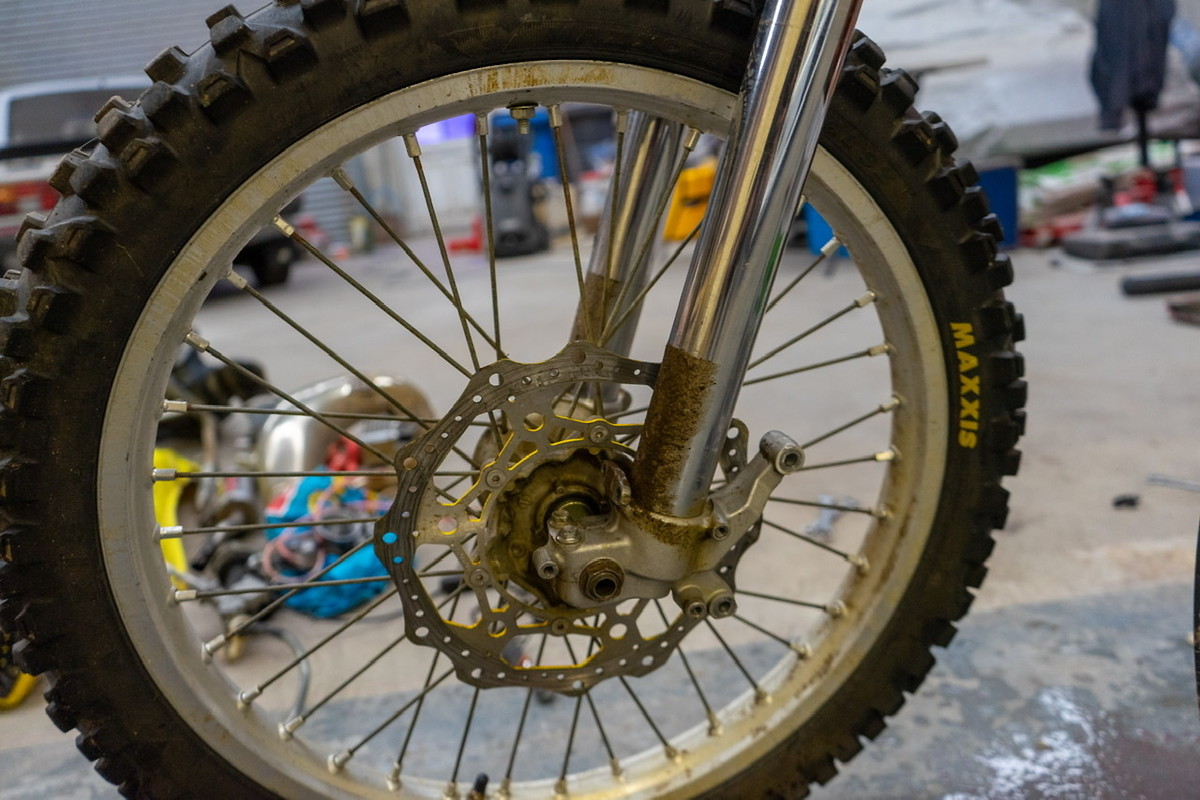
Next step will be to strip the wheels and send the rims and the frame off to the powder coaters.
I will be cerakoting a lot of parts myself once my sandblast cabinet arrives so I will show you guys that whole process.
RM125 Build: Episode 1
This is a link to my YouTube, I’m going to do a build series on the bike and get into more detail on that. Feel free to subscribe if you like.
I’m not 100% comfortable on camera just yet so bear with me.
Let me know what you guys think.
Lockdown is driving us all insane, so I decided to buy the cheapest RM125 I could find to do a full rebuild on and keep myself busy for a week or 2.
I found this thing advertised on Facebook as an ‘08 and thought to myself “f*ck me that’s cheap for an ‘08”. On closer inspection I realised it was an ‘01 and said to myself “I guess it’s still pretty cheap”.
I got someone to pick it up in England and bring it back to Ireland for me.
As you can see it’s far from pretty, the orange frame being the biggest “wtf” of the whole bike. On the plus side it runs really well, although I’m sure some fine tuning of the jetting will help with it loading up etc.
A couple of hours yesterday stripped the whole bike and to my surprise nothing was siezed, broken or badly damaged.
Most bearings and bushings had grease on them, and the only thing I could find worn was the top shock Bush.
I think I will still replace all bearings and bushing now that I’ve got the chance.
At least the previous got full travel on the suspension. The lower triple clamp bolts were so damn tight! And when I loosened the pinch bolts for the front axle the forks sprung outwards. Can’t imagine how much they were binding!
Next step will be to strip the wheels and send the rims and the frame off to the powder coaters.
I will be cerakoting a lot of parts myself once my sandblast cabinet arrives so I will show you guys that whole process.
RM125 Build: Episode 1
This is a link to my YouTube, I’m going to do a build series on the bike and get into more detail on that. Feel free to subscribe if you like.
I’m not 100% comfortable on camera just yet so bear with me.
Let me know what you guys think.
The Shop
As long as your keeping a clean air filter and decent oil mix you should get decent life out of the bottom end
Cool build look forward to seeing your progress
Next job was to strip the engine, simple job and nothing too surprising when it was all opened up. Except the color of the oil, god knows when it last had an oil change.
It’s always baffling to me how previous owners can’t keep on top of simple servicing, but what do you expect on a cheap bike!
Today I will spend some time inspecting all the parts to see if there is any wear, and make a list of what needs replacing. Hopefully a small list!
Subscribe if you want to
Suzuki RM125 engine full tear down, Timelapse
P.S. that Evo is a beauty, well done
Black frame, gold wheels and I've got a cool idea for the graphics. Hopefully it looks as good as it does in my head lol.
And yeah, a lot of work went into that Evo. Glad to be working on something a lot simpler this time around.
There is some wear on the slide, so I will replace it along with a rebuild kit. Is the standard slide size good enough or would it benefit from going up a size to help with low rpm response?
I’ve also left the frame, subframe and rims off to get powder coated. I will be glad to see a color other than that horrible orange.
Their idea is you get a 6.0 and you yourself have to cut it down to a 5.75. Other bikes in the early 2000's used this same carb. Don't bother with trying to buy one from a 05 and newer yz125. It has the same style of carb but it must be slightly updated.
Because the slide is a slightly different shape to it. The 01 thru 04 yz125 would work but Yamaha has discontinued the slide through them. Which leaves two other options Suzuki rm125 01 thru 03. 04 n up rm125 have the throttle position sensor and i think those slides are different.
Kawasaki 03 through 08 and the cr125 maybe 02 more so 03. I would probably buy the slide through Kawasaki because it would probably be less expensive than through Suzuki or Honda for the same thing.
Also i would replace the jet block gasket those wear out. You can get them from jdjetting only place that has them. I included a picture of this from their website. It's only $8 it's worth it. They also sell full rebuild kits for that carb.
I think I would need to buy a rebuild kit from them along with the jet block gasket kit as I couldn't justify having something that small shipped to Ireland. It would cost more to ship than the actual gasket kit.
Which is no issue, I stripped it to do a rebuild anyway.
Stoked to see where this RM goes too.
Pit Row
They're a great car, I'm thinking about buying a IX once this one sells.
Here’s a before and after on the swingarm. I wanted to go for a “brushed steel” look but will decide when it’s on the bike and smooth/polish it out if I don’t like it.
Before:
After:
I finally picked up a sand blaster for my workshop. This 1 will fit an 18” alloy wheel so it will be more than big enough for my needs. I can now begin getting things ready for Cerakote and get a lot of parts cerakoted over the next week or 2.
I did a little test to make sure it works. (I’m pretty sure these foot pegs will end up in the bin)
*Edit* not sure why the sand blaster is upside down..
Still working on this YouTube thing but were getting there!
Suzuki RM125 Engine Teardown
I thought a quick run in the sand blaster followed by a bit of wire wheeling and some final polishing would do the trick. Boy was I wrong.
After hours of sandblasting and wire wheeling I ended up using a flap/sand disc on the grinder and just ground the Nickel plating off until I reached the metal underneath. Then some polishing and a little heat treatment to the welds finally made it look good.
I am aware that I risk weakening the pipe by grinding too much but I was careful to make sure I only broke through the nickel plating and no more.
The original plan was to reverse electro plate the nickel off. Simple process but I couldn’t get sulfuric acid unless in bulk. And I wasn’t prepared to stockpile 100 gallons of acid!
I will post a vid of the process once I get it edited.
Anyways, before and after pics:
The process is pretty straight forward, the main thing being extremely clean and accurate. As it is a 1 coat system it’s important to try and get an even coverage in 1 pass.
These turned out pretty good but I’m sure the next ones will turn out better.
*the front exhaust cover had some pitting/marks on it beforehand but I’m not too worried as it’s not really seen when the engine is installed*
This was after sandblasting:
And finished:
Now that I have the test parts out of the way I can go crazy cerakoting everything I can.
I’ve also sent the cylinder off to get re-plated as the top edge was all chipped, probably from detonation. Once that is back I can reassemble the engine.
And the frame and rims should be back from powder coating this week, so I will very quickly go from doing sweet f*ck all to building this thing back together.
Graphics are currently being designed too!
Front brakes were siezed on this bike so it was good to get them stripped down. The seals looked f*cked and the pistons were pretty hard to get out so they were definitely overdue!
Fresh out the oven
This should be all I will do bronze
Would anyone like to share their opinion on doing the hubs this bronze colour? Will it clash with the gold rims or maybe it will turn out pretty good?
I’ve also got a slightly metallic charcoal that might work well against gold rims.
2 Stroke pipe transformation
Ever since I sold the Evo I restored (pics in my 2nd post) I’ve had people wanting me to do their cars. Right now I’ve got another Evo TME, a Ford Escort Cosworth and a Nissan Silvia S15 (240sx) all getting restoration work. Needless to say I’ve become a little busy haha!
But enough car talk, this is a Moto forum!
Since my last post I’ve got graphics made up and had a chance to fit them. I also got my frame and subframe back from the powdercoaters and did a little bit more Cerakoting. I am still waiting to get my rims back from the powder coaters so I can build the wheels (one of my favourite jobs.
The biggest update is that I finally got everything I need to build the engine, including the replated cylinder and an OEM piston. I got a start on assembling the engine tonight but it was getting late so I called it a night. I should get it finished tomorrow evening.
Hopefully it won’t be much longer now to complete this build since pretty much everything is here. All the tracks have pretty much opened again so I’m keen to get this thing out and see what it can do.
And if you like these videos or any of the GoPro vids you should consider subscribing
Dirt bike Graphics Install
Post a reply to: 2001 Suzuki RM125 Rebuild/Restore